Customize Display Options
Info
This page is part of the 5zig Options Guide explaining all the different options that 5zig Reborn offers.
This section has been separated because of its size and/or complexity.
The Customize Display... option is, as the name suggests, a way to customize the display of the 5zig Reborn Mod in various ways.
This page is dedicated towards explaining the various options and what they do.
Overview
When you look at the Option screen for the first time will it be a bit confusing at first, but after a while (And after reading through this page) should you have a fairly easy understanding of the screen and how to navigate through it.
Options
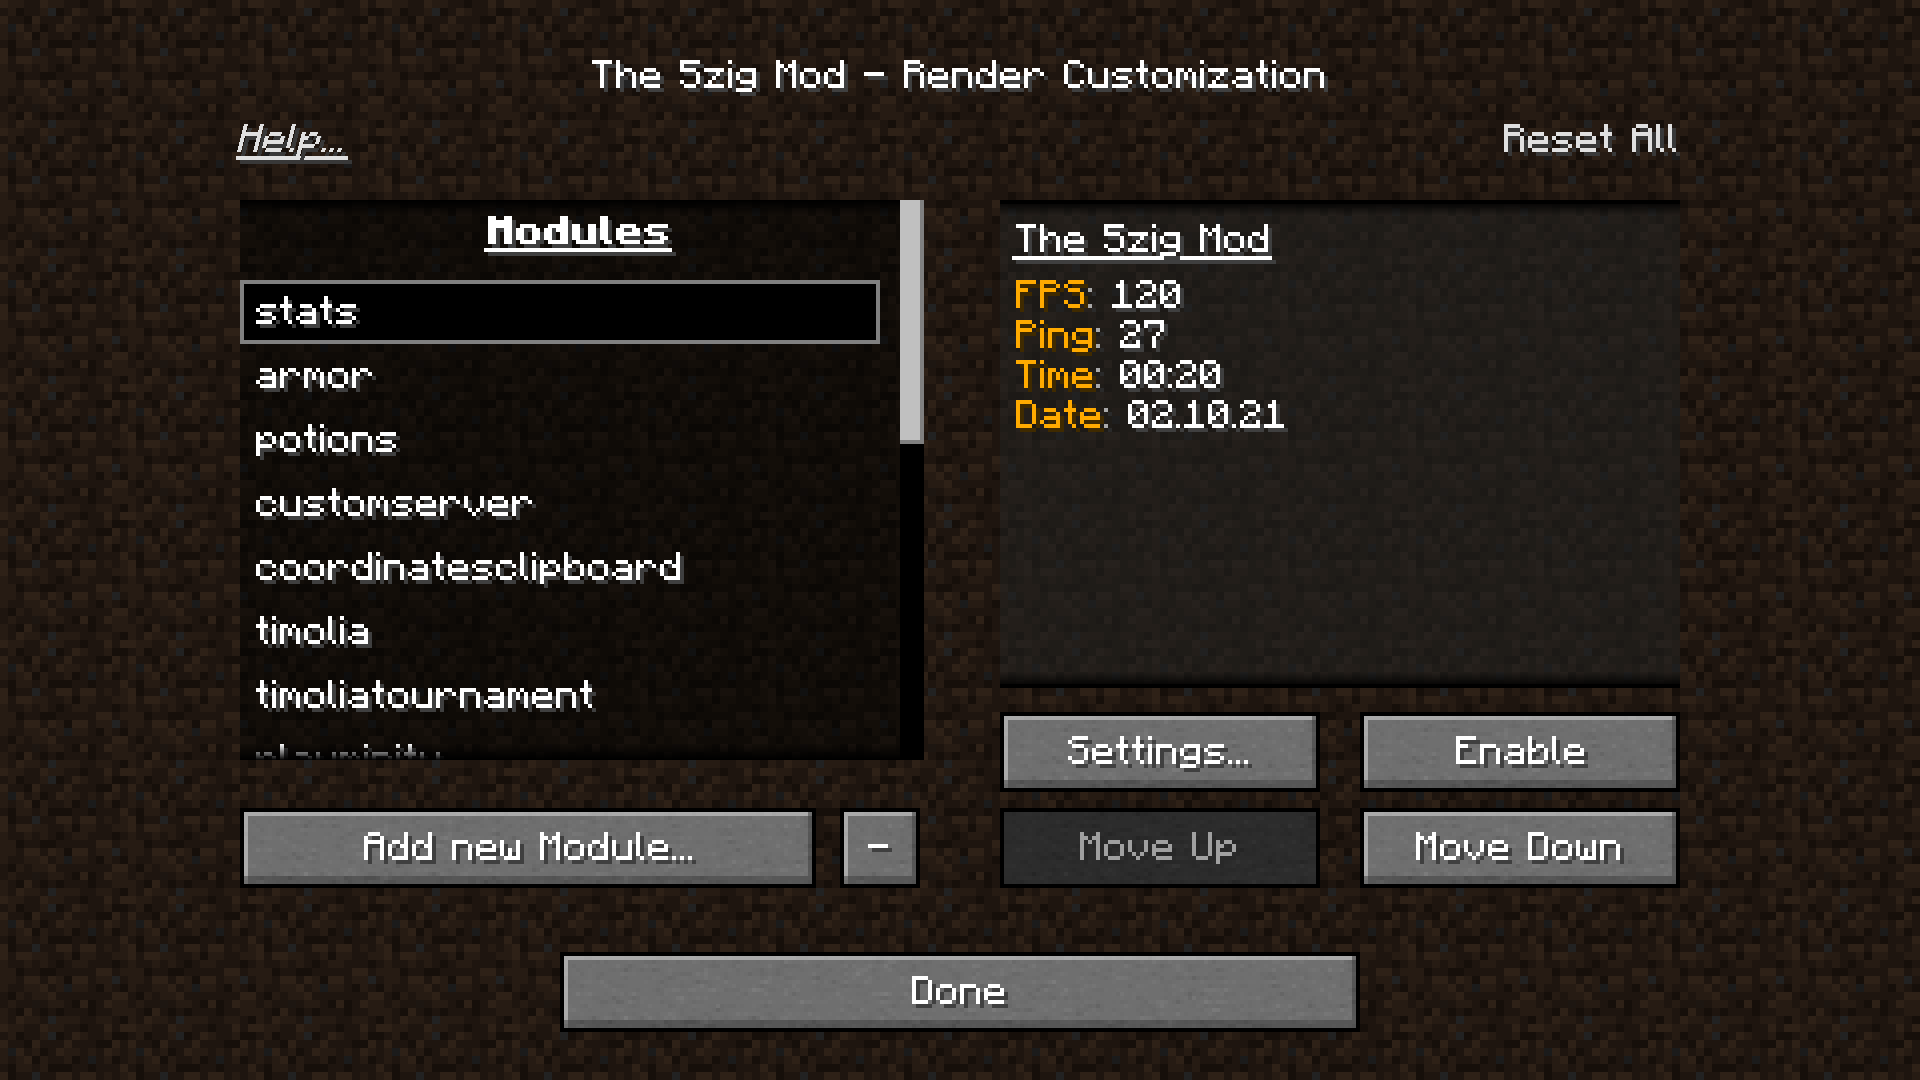
Modules
The Modules section on the left lists the different HUDs you currently have. By default are there already a few created that can be used ingame.
To remove a module, select it and click the - button.
Add new Module
With Add new Module... can you create a new module that should be displayed.
When clicking it will a new module with the name new-module be added. If such a module already exists will a - be appended to the name.
After its creation can the module be configured by clicking on the Settings... button.
Settings
The Settings... button allows you to configure your currently selected module.
Clicking it will open a screen where you can configure the Module.
How you can configure a Module is covered in a dedicated section below.
Enable/Disable
This button will display either Enable or Disable depending on the Module’s current state. Clicking it will toggle the state of the current Module to enabled or disabled.
Move Up
Move Up will move the module one position up in the list.
This button will be disabled (greyed out) while the module is at the very top of the list.
The position of the module has no direct influence on how/where they are displayed.
Move Down
Move Down will move the module one position down in the list.
This button will be disabled (greyed out) while the module is at the very bottom of the list.
The position of the module has no direct influence on how/where they are displayed.
Editing a Module
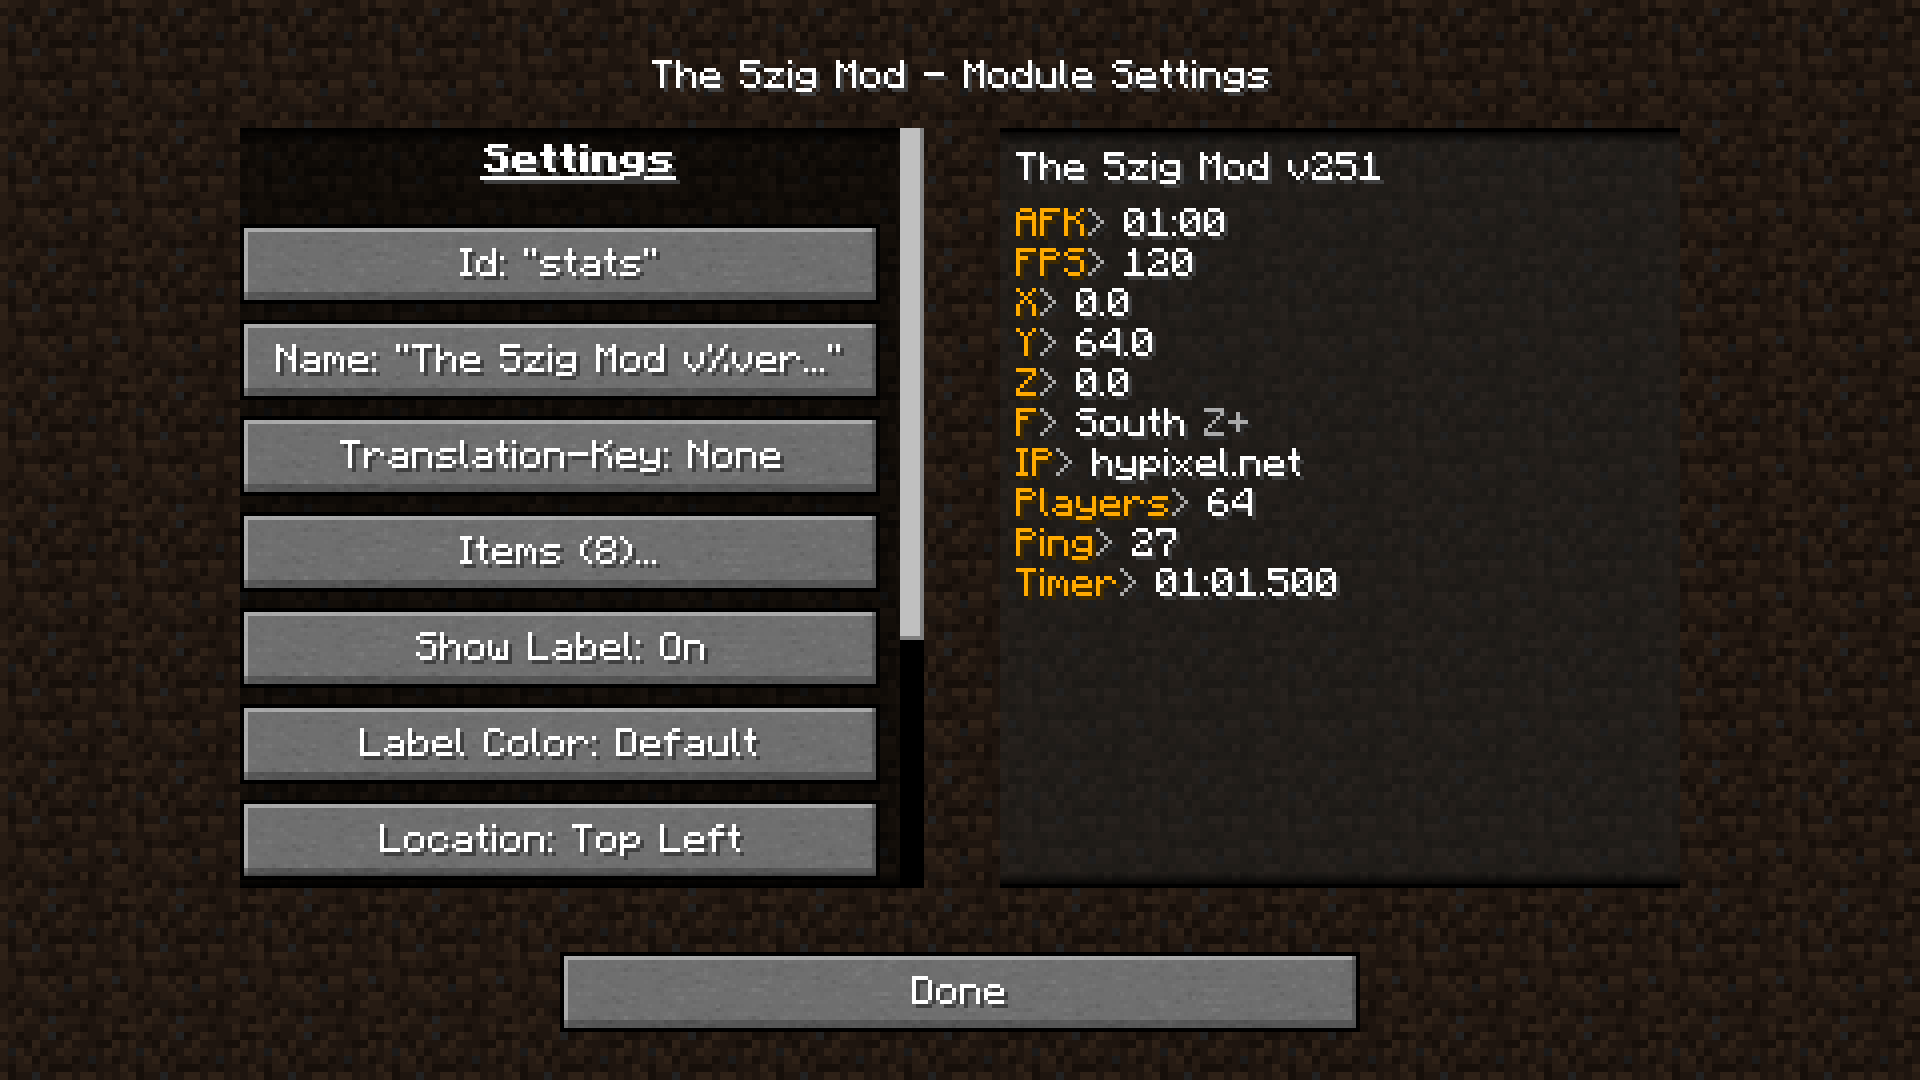
When clicking the Settings... button will you be greeted with a new screen that contains a lot of buttons to change and edit.
Id
The Id field contains the name under which the module is saved. Clicking it opens a textfield where you can edit and save the new name of the module.
Name
Name is the text displayed above the different items of the module.
You can use the %version% placeholder to display the 5zig Reborn version.
Translation-Key
The Translation-Key setting is used when you want the text to be different per language used.
When set will 5zig try finding the provided key in its currently used language property-file and if found display the corresponding value for it.
Example:
Setting Translation-Key to armor.title while using en_US as language will make 5zig Reborn search for armor.title in the language_en_US.properties file and display Armor HUD as a result for it.
Items
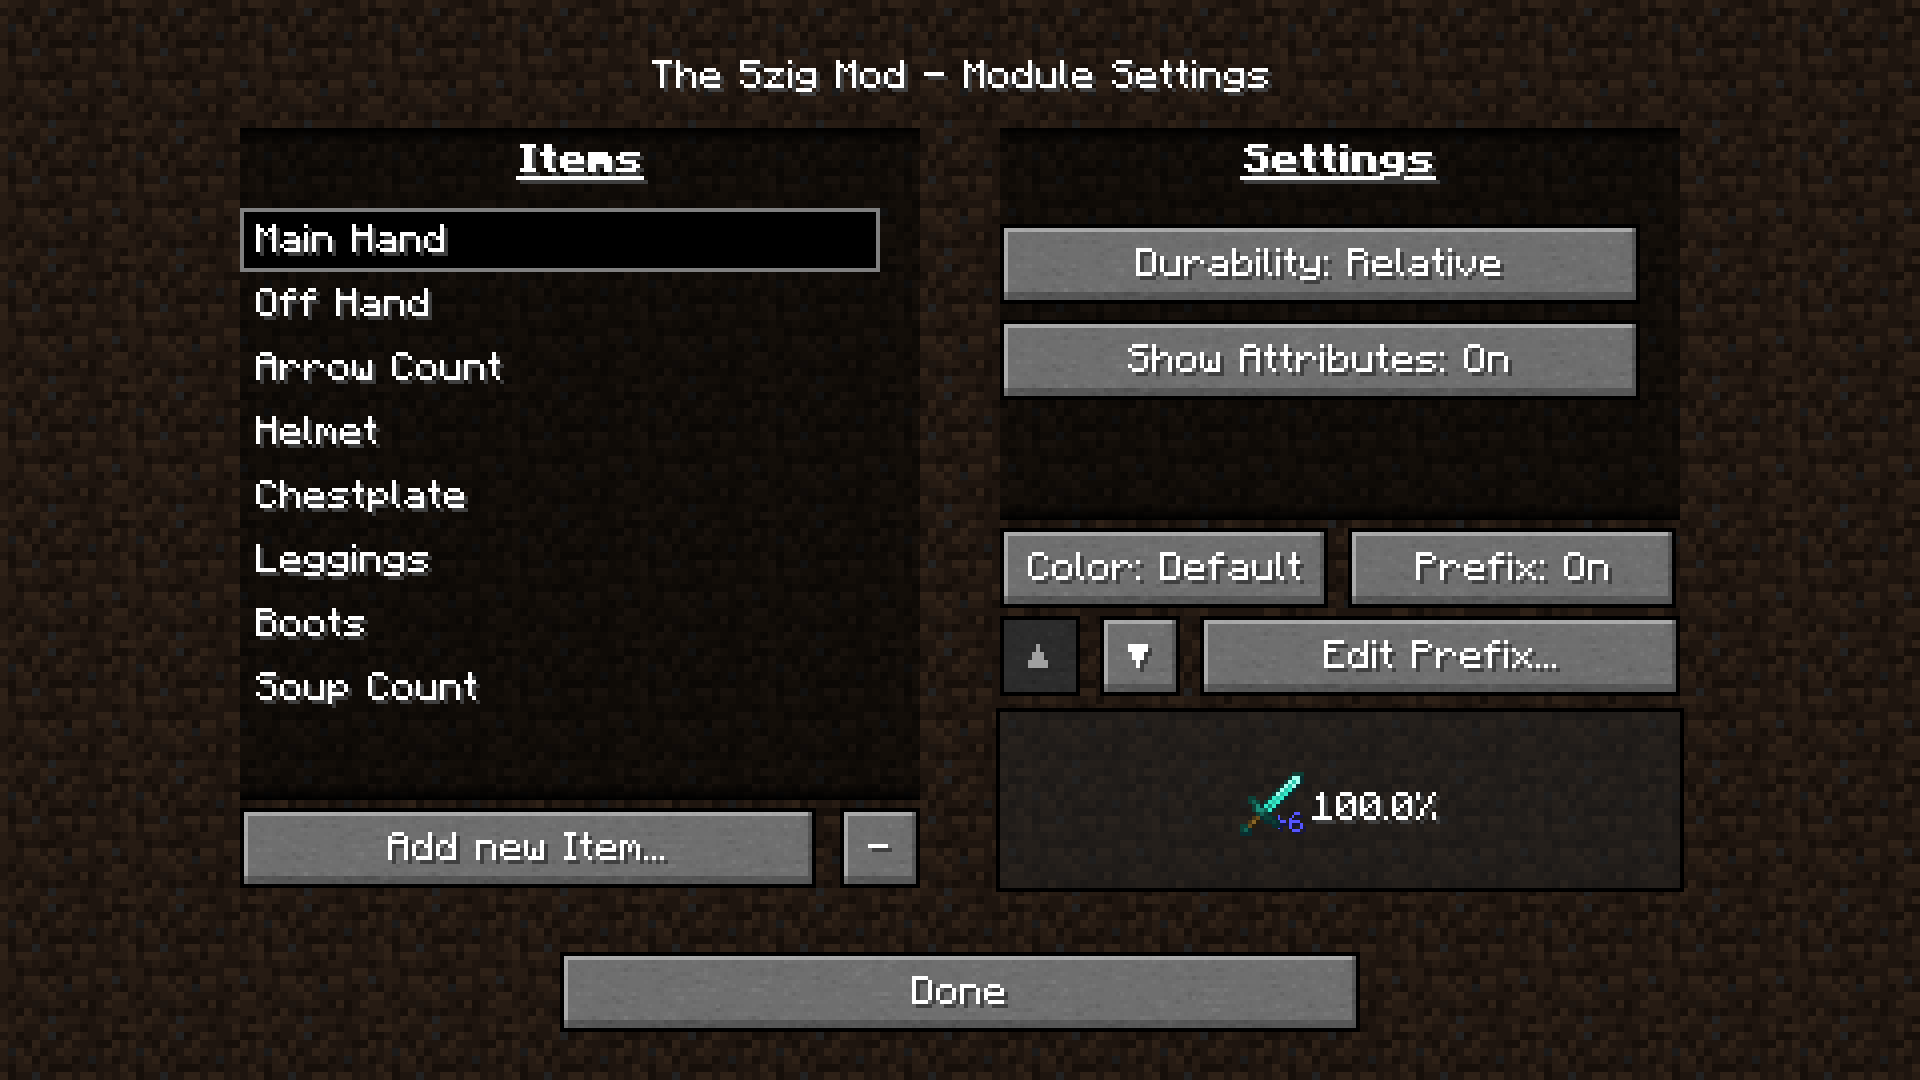
The Items (<number>)... button opens yet another screen where you have different options.
Items Field
The Items field on the left lists all currently added items for this module.
You can use the Add new Item... button to add another item or click the - button to remove the currently selected one.
Add new Item
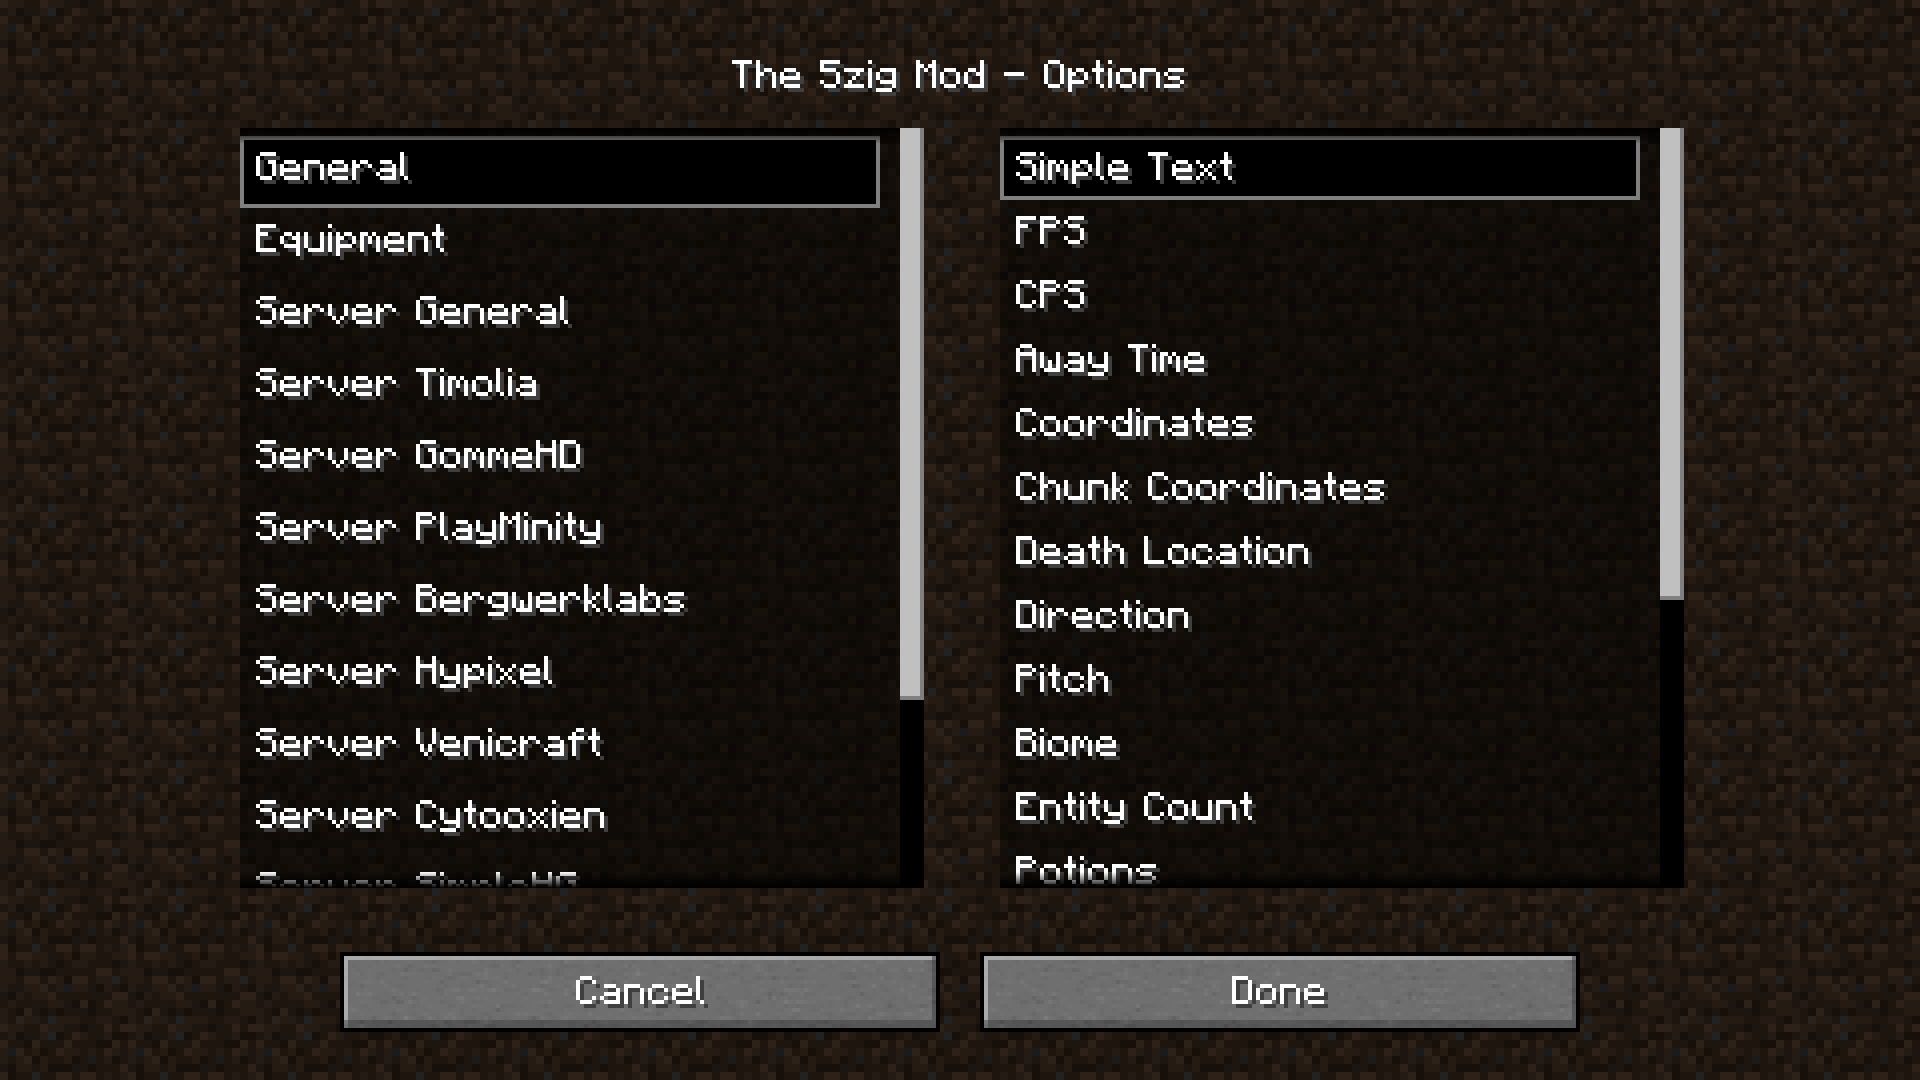
With Add new Item... can you add an item to the list. You will have a screen with two sections in it.
On the left one can you see different categories such as General, Equipment or Server specific categories.
On the right side will you see the different item types for that selected category. Most of the items have a tooltip that explains what they display when you hover over them.
Settings
The Settings section will contain options relative to the currently selected item.
For example will Main Hand and Off Hand have the options Durability and Show Attributes.
Color
With the Color option can you change how text should be displayed.
Clicking the option will open a screen with the following options:
Color
Click to toggle betweenDefaultandCustom. Second one will unlock the other options.Prefix Formatting
Click to cycle betweenDefaultand the formatting optionsRESET,BOLD,ITALICandUNDERLINE.Prefix Color
Hover over the coloured square to display all 16 available colours and click on the one you want to use.Main Formatting
Click to cycle betweenDefaultand the formatting optionsRESET,BOLD,ITALICandUNDERLINE.Main Color
Hover over the coloured square to display all 16 available colours and click on the one you want to use.Custom Prefix Color
Click to set a HEX colour code to use. You don’t have to add a#to it.Custom Main Color
Click to set a HEX colour code to use. You don’t have to add a#to it.
Prefix
Click to toggle between showing and hiding the prefix.
Edit Prefix
Click to set a prefix. This may only work with specific items.
Up/Down arrows
Click the up/down arrow buttons to switch the position of the item in the list.
The buttons may be disabled (greyed out) if the item is at the very top or very bottom of the list.
The position of the item affects where it is displayed in the Module itself.
Preview window
The window at the bottom right will give you an example of what the item may display and how it may look like.
Show Label
You can click the Show Label button to toggle between showing or hiding the module name. The name can either be the one you set through the Name option or the one displayed through a translation key.
Label Color
Allows you to change the colour of the label.
Clicking it will open a window with the following options:
Color
Click to toggle betweenDefaultandCustom. Second one will unlock the other options.Main Formatting
Click to cycle betweenDefaultand the formatting optionsRESET,BOLD,ITALICandUNDERLINE.Main Color
Hover over the coloured square to display all 16 available colours and click on the one you want to use.Custom Main Color
Click to set a HEX colour code to use. You don’t have to add a#to it.
Location
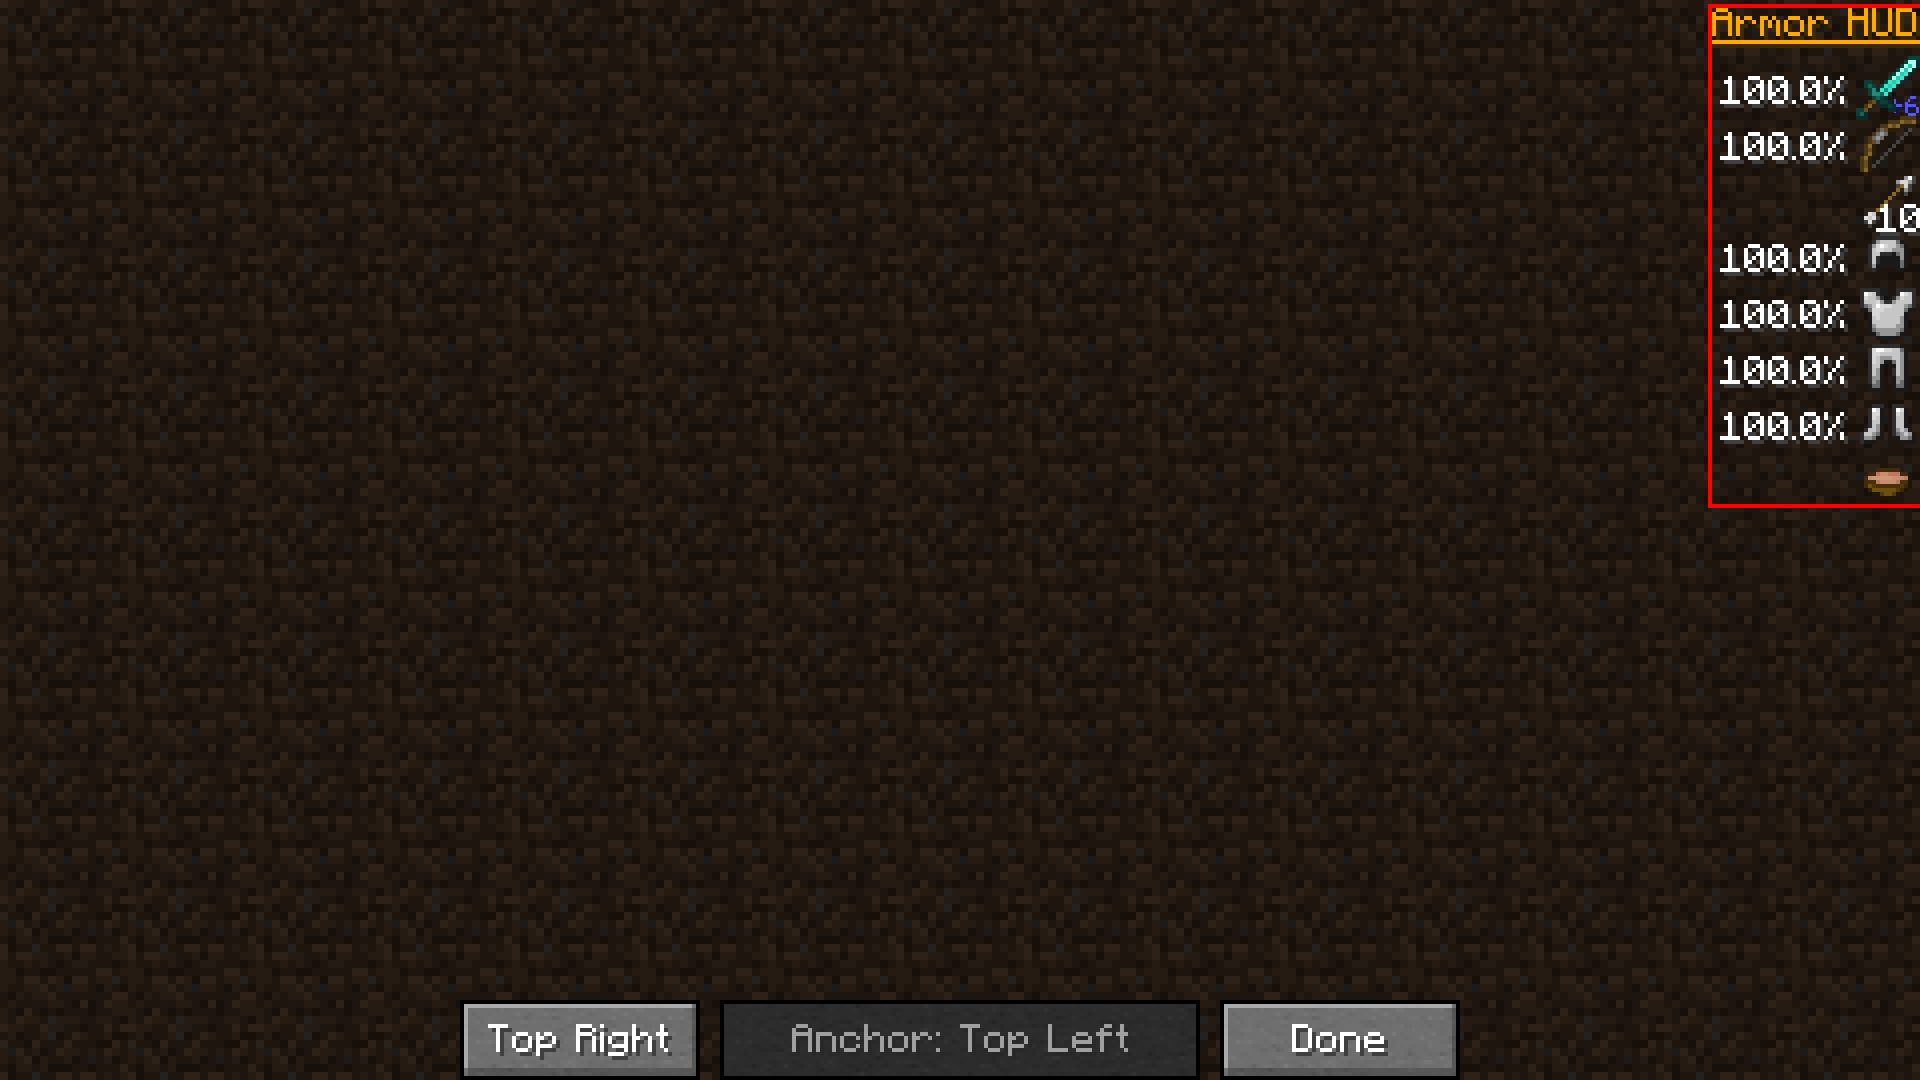
The Location option opens a new screen where you can set the location of the Module.
The button on the left allows you to set the module’s position to either Top Left, Top Right, Center Left, Center Right, Bottom Left, Bottom Right or Custom.
Last one will automatically be selected when you drag and drop the module with your cursor.
The Anchor button can be used to set the Alignment of the items relative to the module. For example will Top Left put the items on the very top-left of the module. The Anchor is indicated with a small red square.
You can toggle between Top Left, Top Center, Top Right, Center Left, Center, Center Right, Bottom Left, Bottom Center and Bottom Right.
Server
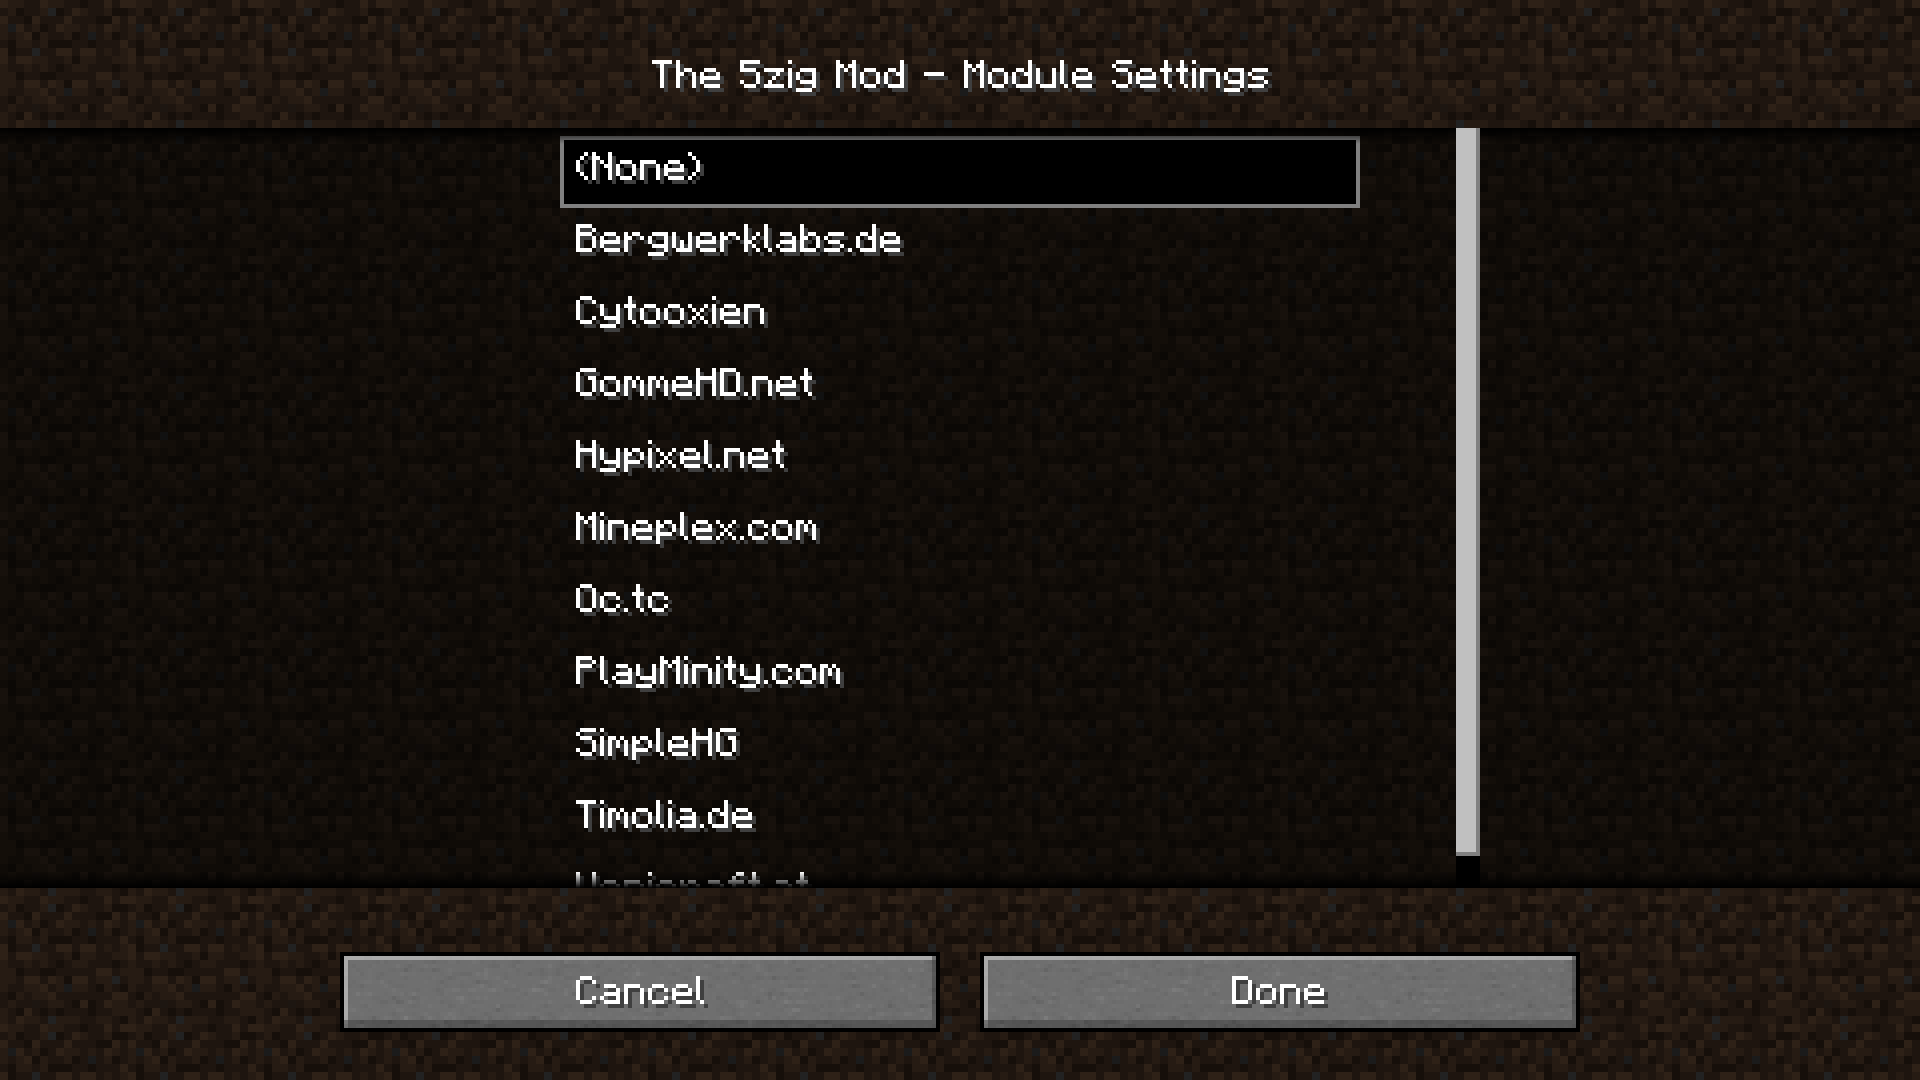
Server opens a list of Server domains that you can choose from. Selecting one will set the module to only show when you join that particular server.